Blog
Installation Ease with Wallpeg Pegboards!
Here at Pegboard we tell people that our pegboard is easier to install, but today we are going to show you. By comparing the installation process of both regular, cheap, Masonite pegboard and Wallpeg Easy-Mount pegboard, you will see the distinct advantages our products have.
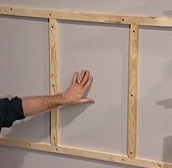
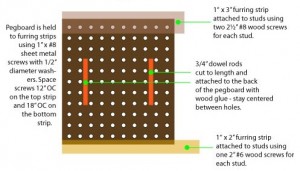
TRADITIONAL MASONITE PEGBOARDS
To install Masonite pegboard, which is just a flat board with peg holes, you need to configure furring strips to mount the board on to. Without the strips, the peg holes will be flat against the wall, allowing zero functionality. Not only do furring strips require extra money, time, and tools, but they also block some of the peg holes from being used.
 |
 |
WALLPEG PEGBOARD
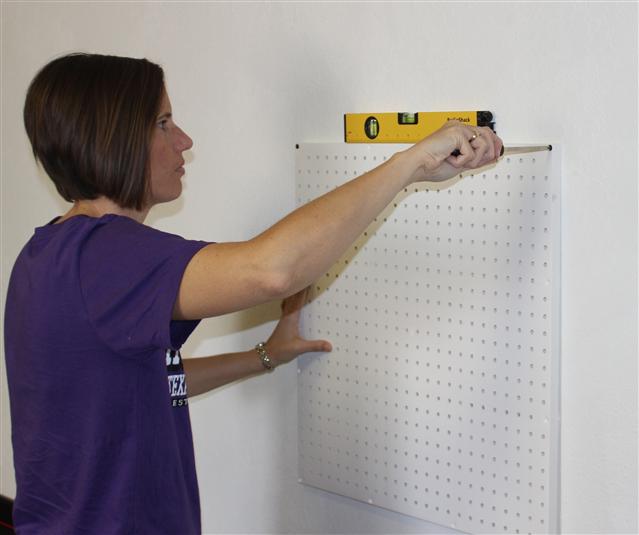
On the other hand, our pegboard comes ready to install right out of the box. Our pegboard has ribs on the back that act as furring strips so no extra work is required for installation, and no peg holes are blocked. Your pegboard will be up in three easy steps:
Step 1) Position the board where you want to mount it…eyeball or measure to find your desired starting point.
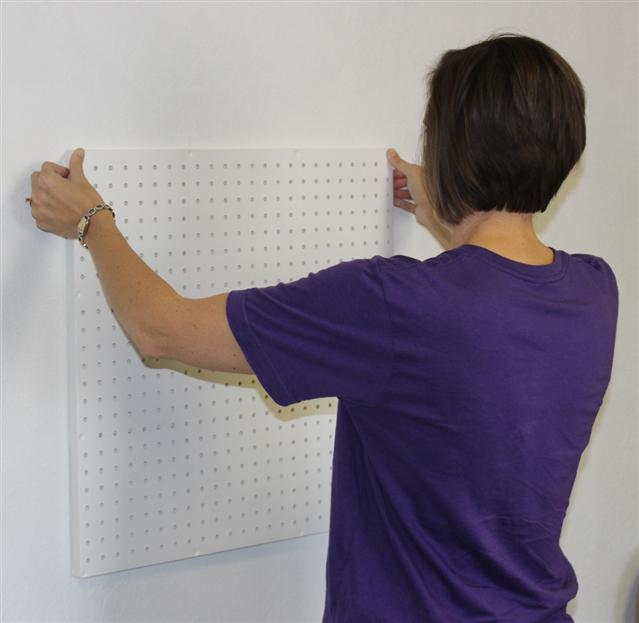
Step 2) Screw in the one top corner
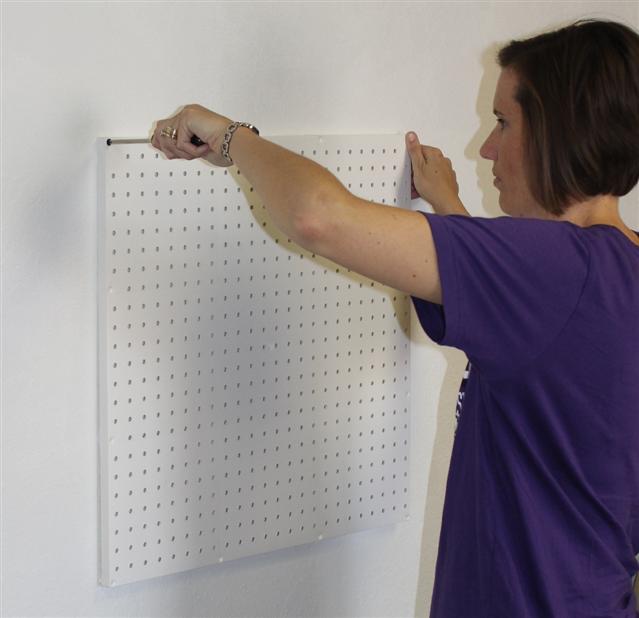
Step 3) When the screw is wrist tight, use a level to insure the board is even across and screw the other top corner down
Screw the remaining corners down and your done! Add a few hooks or other accessories to complete your project and you’re on your way to a neat, organized room.
What size screws do you recommend? Should I use a drywall anchor? Each 2′ x 2′ section has 12 holes. Do I need to use all of the holes?
We recommend that you use as many of the screw holes as possible. Use 1 5/8″ coarse thread screws #6 to mount to studs or Sheetrock
Do you have to mount wall board to studs or can you just screw into sheet rock wall?
It really depends on what you are using the pegboard for. That said, even most applications involving heavy tools or equipment should be functional in the sheetrock (vs. requiring studs) if the proper wall anchors are used. Here’s a good article on the subject: http://www.naturalhandyman.com/iip/inffastener/infanchor/infanchor.html. However mounting the pegboard on studs whenever possible will ensure maximum weight capacity.
What screws can I use to mount this to my cinder block wall?
This is a useful article on that subject: https://www.familyhandyman.com/project/how-to-choose-and-use-concrete-fasteners/. Depending on what kinds of tools or equipment you plan to hang from your pegboard, we would recommend one of the medium or heavy-duty installation methods outlined in the aforementioned article.